Blog

Home

Blog

  • Getting Your BBQ Grill Ready for Grilling Season
    Getting Your BBQ Grill Ready for Grilling Season
    Nov 17, 2024
    Are you excited and prepared to start the grilling season with elegance and enthusiasm? As the cold weather approaches and the scent of grilled foods fills the air, it's time to prepare your BBQ grill for the grilling time. Now, let us take essential steps to ensure your grill is ready to go. 1. Clean the Grill Grates Start by removing any food residue or grime from the grill grates. Use a wire brush or scraper to thoroughly clean the surface. This will help ensure that your food doesn't stick and that your grill produces an even heat. 2. Inspect the Grill Parts Take a close look at all the parts of your grill, including the hinge, cast iron parts, main body, standing and more details. Replace any worn-out or damaged parts to prevent any issues during grilling.   3. Oil the Grill Grates Once the grill grates are clean, apply a light coating of oil to prevent sticking. You can use a paper towel dipped in vegetable oil and rub it over the surface of the grates. 4. Check the Fuel Source Whether you're using charcoal, propane, or another fuel source, make sure you have enough on hand. For charcoal grills, make sure the ash is cleaned out and the vents are clear. For gas grills, check the propane levels and make sure the gas line is secure and free of leaks. 5. Preheat the Grill Before you start grilling, preheat the grill for about 10-15 minutes. This will help ensure that it reaches the proper cooking temperature and that the grill grates are hot enough to sear the food, locking in flavor and juices. 6. Organize Your Grilling Tools and Accessories Make sure you have all the necessary tools and accessories, such as tongs, spatulas, basting brushes, and grill mitts. Having everything organized and within reach will make your grilling experience more enjoyable and efficient.  7. Plan Your Menu With your grill ready to go, it's time to start planning your menu. Think about what foods you love to grill and what ingredients you'll need. Don't forget to consider sides and desserts that complement your grilled dishes. We believe that by following these steps, you can ensure that your BBQ grill is ready for the grilling season and that you're prepared to create delicious, memorable meals for friends and family in this cold winter!  
    Read More
  • Finding the best Kamado grill model that suits you
    Finding the best Kamado grill model that suits you
    Nov 18, 2024
    Finding the best Kamado grill model that suits you involves considering several factors such as your budget, grilling needs, available space, and personal preferences. We would like to provide some advice to select the ideal Kamado grill.   1. Set a Budget:Determine how much you are willing to spend on a Kamado grill. Prices can range from entry-level models to high-end, professional-grade options.   2. Grilling Needs:Consider how often you plan to use the grill and what types of food you typically cook. Some Kamado grills are better suited for low-and-slow cooking, while others excel at high-temperature searing.   3. Available Space:Measure the area where you plan to place the grill and ensure you have enough space. Consider both the footprint of the grill and the space needed to open the dome fully.   4. Materials and Durability:Look for grills made from high-quality, durable materials. Ceramic Kamado grills are popular for their excellent heat retention and distribution, but there are also other materials like cast iron and stainless steel.   5. Features and Accessories:Consider the features that are important to you, such as adjustable vents, built-in temperature gauges, and accessories like grates, griddles, and pizza stones. Some models come with a variety of accessories, while others may require you to purchase them separately. 6.Warranty and Customer Support:Check the warranty information for the grill and ensure that the manufacturer offers good customer support. This can be important in case you encounter any issues with the grill. Fujian Egg Kamado Grill Co.,Ltd supplies different size kamado grills for you. Compare different model to find the one that suits you best!
    Read More
  • CURING THE KAMADO
    CURING THE KAMADO
    Nov 12, 2024
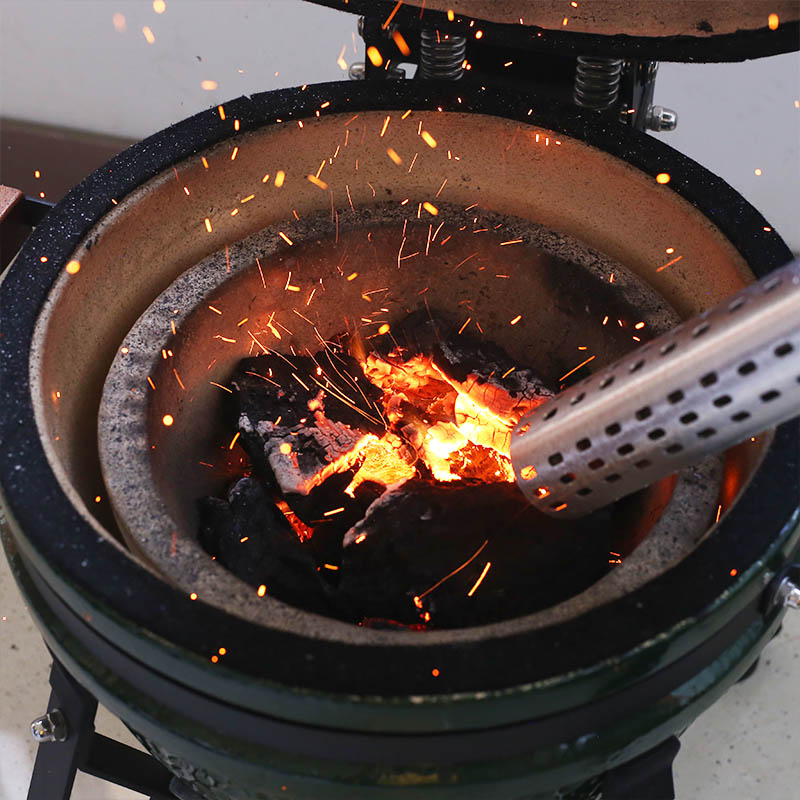
    Now more and more people use ceramic kamado grill, how to curing the kamado, you can follow the below steps for reference. • To start a fire place rolled up newspaper with some lighter cubes or solid firelighters on the charcoal plate in the base of the Kamado. Then place 2 or 3 handfuls of lump charcoal over the top of the newspaper. • DO NOT use petrol, white spirit, lighter fluid, alcohol or other similar chemicals for lighting or relighting. • Open the bottom vent and light the newpaper using a long nosed lighter or safety matches. • DO NOT overload the unit with fuel – if the fire is too intense this could damage the Kamado. • Leave until all the fuel is used and extinguished. • If the first burns are too high it could damage the felt gasket seal before it has had the chance to mature properly. • After first use inspect all fasteners for tightness. The metal band connecting your lid to the base will expand from the heat and this could become loose. It is recommended you check and if necessary tighten the band with a spanner. • You can now use and enjoy your Kamado as normal.  
    Read More
  • Is an expensive ceramic oven worth buying?
    Is an expensive ceramic oven worth buying?
    Oct 25, 2024
    When you invest in a premium charcoal grill, you’re not just paying for a cooking apparatus; you're investing in an experience. A good Kamado grills excel in materials, craftsmanship, performance, versatility and durability to provide users with a high-quality grilling experience. Versatility: The Kamado grill can not only grill, but also smoke, bake, bake and even make pizza, achieving a multi-purpose function. This versatility makes the Kamado grill ideal for family gatherings or outdoor picnics. Temperature controllable: Kamado grill has excellent temperature control capabilities with a wide temperature range, from low to high temperatures can be easily achieved. Users can adjust the temperature as needed to cook various delicacies to meet different taste needs. High efficiency and energy saving: The Kamado grill can cook for long periods of time without too much supervision, making it suitable for long slow roasting or quick searing. Due to its unique design, it uses fuel efficiently and consumes less charcoal or other fuel than other types of grills, giving it excellent thermal efficiency. Durable and easy to maintain: Kamado grills are typically made from high-quality ceramic or metal, which make the grill extremely durable and able to withstand high temperatures and weather conditions. Cleaning and maintenance are also relatively simple, with many models featuring designs that are easy to clean and clean. Environmentally friendly: Due to its efficient fuel utilization, Kamado grill reduces the consumption of charcoal fire or other fuels, thereby reducing environmental pollution. It also does not produce excessive smoke or odor when used outdoors, making it environmentally friendly. Widely applicable: The Kamado grill is suitable for users of all cooking levels, from beginners to professional cooks. Every time you fire up a high-quality charcoal grill, you're reinforcing a commitment to culinary excellence. It is a celebration of food, flavor, and good life. 
    Read More
  • What are the safety precautions when using a ceramic grill?
    What are the safety precautions when using a ceramic grill?
    Oct 24, 2024
    When using a Kamado grill, it's crucial to follow certain safety precautions to ensure a safe and enjoyable grilling experience. By following these safety precautions, you can enjoy grilling with your Kamado grill while minimizing the risk of accidents and injuries. Remember, safety always comes first when handling any type of cooking equipment. Outdoor Use Only: Kamado grills are designed for outdoor use. Never use them indoors as they can pose a fire hazard and produce harmful fumes. Ventilation and Oxygenation: Before opening the dome of the Kamado grill, make sure to open both vents and wait for a few seconds to allow oxygen to flow in. When opening the dome, lift it slightly first and wait before opening it completely to prevent a sudden backfire. Cooling Down: Wait until the ashes have completely cooled down before attempting to remove them or clean the grill. Never dispose of warm ashes as they can still cause burns. Supervision of Fire: Never leave the grill unattended when it's in use or has hot coals inside. Always keep an eye on the fire to prevent accidents. Protective Gear: Wear gloves and protective clothing when handling the grill, especially when it's hot. Avoid touching the grill body directly during use. Stability: Do not move the Kamado grill when it's in use or if there's still hot dust inside. Place it on a stable grill table to prevent it from tipping over or causing a fire on other surfaces. Flammable Liquids: Avoid using flammable liquids to ignite the grill. Instead, use an electric charcoal starter or a charcoal chimney starter to avoid any risks associated with flammable substances. Keep Children and Pets Away: When operating the Kamado grill, make sure to keep children and pets at a safe distance to prevent them from getting burned or injured.
    Read More
  • What is the Egg grill ceramic Kamado Divide & Conquer System?
    What is the Egg grill ceramic Kamado Divide & Conquer System?
    Oct 15, 2024
    The grill grate has been around for years and it hasn't really changed much. In fact I'm not sure it's really changed at all!   It just sits there and gets dirty. What if we gave it something to do besides just sitting there? What if we halved it and allowed it to function on different levels to create different heat zones? To create more grilling space. What if we made it interchangeable with specialty cooking surfaces. What if we made it versatile and useful? Well thats exactly what Egg Kamado have done, they've given us multi-level flexibility, multi-surface versatility.  The clever and revolutionary Divide & Conquer Flexible Cooking System replaces the ordinary grill grate. The key is the “Half Rack Design” the halving of all components to allow for multi-level flexibility and multi-surface versatility. The two- piece cooking grid and multi-level rack give you 3 big advantages over the standard grill grate! 1.GET TWICE THE COOKING SPACE (or more) The Flexible Cooking System allows you to cook on two different levels at the same time, effectively doubling your cooking space! With the optional Grill Expander you can even cook on three levels. This gives you 660 square inches of total cooking surface – more than any other standard (19") grill! 2.CREATE DIFFERENT HEAT ZONES The halved Kamado Joe Heat Deflector (included) allows you to create different heat zones within the grill at the same time. For example, on one side, you install a half Heat Deflector on the lower level and a cooking grate on the upper level. Here you can cook veggies with indirect heat. At the same time, on the other side, you install a half grate on the lower level to cook your meat. 3.ADD CUSTOM COOKING SURFACES The Divide & Conquer Flexible Cooking System also allows you to add custom halved Egg Kamado Cooking Surfaces for even more cooking versatility!  Such as laser cut Stainless Steel or Cast Iron grates, Cast Iron Griddles, Pizza Stones and Soapstones. But how do you use EGGKAMADO Divide & Conquer Cooking System? Take a look at the parts that make the EggKamado Divide & Conquer cooking grate and the various configurations you can use - Its truly genius!
    Read More
  • Ways To Place Charcoal In a Ceramic Barbecue Grill
    Ways To Place Charcoal In a Ceramic Barbecue Grill
    Oct 02, 2024
    There are several ways to place charcoal in a ceramic barbecue grill, each suited for different cooking needs and preferences. Uniform Spread: The most straightforward method is to uniformly spread the charcoal across the bottom of the grill. This ensures even heat distribution and is ideal for foods that require consistent cooking temperatures. By avoiding large gaps between the charcoal pieces, you can maintain a stable and predictable flame, making it perfect for beginners or those seeking simplicity. Stacked or Pyramid Shape Another popular way is to stack the charcoal into a pyramid or cone shape. This arrangement allows for a more concentrated ignition point, as the charcoal at the bottom ignites first and gradually spreads to the top layers. As the charcoal burns down, it maintains a consistent heat source, making it great for long, slow cooking sessions. Additionally, the shape promotes good airflow, which aids in combustion and helps maintain a steady flame. Layered or Ringed for Smoking If you're interested in adding smoky flavors to your food, you can layer or arrange charcoal in a ringed pattern with wood chips or chunks placed strategically within or on top of the charcoal. For layered smoking, alternate layers of charcoal and smoking wood, creating a stack that slowly imparts smoke flavors as it burns. Alternatively, create a ring of charcoal and place smoking wood in the center or around the perimeter. This method controls the amount and direction of smoke, allowing you to customize the level of smokiness in your dishes.
    Read More
  • How is a ceramic grill made
    How is a ceramic grill made
    Sep 24, 2024
    Crafting a ceramic grill is a meticulous process that involves several intricate steps. Each stage is carefully executed to ensure the creation of a high-quality, functional, and visually appealing masterpiece. Let's delve into the fascinating journey of making a ceramic grill.   1. Mold Making: The first step in creating a ceramic grill is to design and fabricate the molds. These molds serve as the foundation for shaping the various components of the grill.   2. Mud Refining: Next, the clay or mud is refined to achieve the desired consistency. Skilled artisans and matching meticulously knead and shape the clay, removing any impurities and creating a smooth, workable material.   3. Shell Making: Using the refined clay, the artisans form and shape the ceramic shell of the grill. This step requires precision and attention to detail to ensure the creation of a perfect shell structure.   4. Ceramic Repairing: During the creation of the shell, any imperfections or unevenness are meticulously repaired. The artisans utilize their expertise to ensure that the ceramic shell is flawless and sturdy.   5. Ceramic Drying: Once the shell is complete, it undergoes a controlled drying process. This allows the ceramic to gradually harden and stabilize, ensuring its durability and longevity. 6. Ceramic Firing: After the drying stage, the ceramic shell is fired in a kiln at high temperatures. This firing process solidifies the ceramic and imparts strength and resilience to withstand extreme heat. 7. Ceramic Polishing: Once the ceramic shell is cooled, it undergoes a meticulous polishing process. Skilled craftsmen use specialized tools and techniques to refine the surface, and provides a good base for glazing   8. Automatic Glazing: To enhance the aesthetic appeal and protect the ceramic, an automated glazing process is employed. This coats the grill with a beautiful, protective glaze, adding an exquisite touch. 9. Glazed Firing: The glazed grill is fired again in the kiln. This firing ensures that the glaze bonds securely with the ceramic, creating a vibrant and long-lasting finish. 10. Glazed Checking: After the final firing, the grill is carefully inspected to ensure that the glaze is even and flawless. Any inconsistencies are addressed, guaranteeing a visually stunning end product.   11. Grill Assembling: The various components of the ceramic grill, including the body, grates, and ventilation system, are expertly assembled. This meticulous process ensures that the grill functions seamlessly and efficiently. 12. Quality Controlling: Before the ceramic grill is ready for the market, it undergoes rigorous quality control checks. Each aspect, from functionality to aesthetics, is scrutinized to deliver a product of utmost quality and customer satisfaction. Creating a ceramic grill is an art form executed with passion and precision. Every step in the process contributes to the creation of a culinary masterpiece, allowing grill enthusiasts to savor the flavors of outdoor cooking style and elegance.
    Read More
  • How to test kamado grill
    How to test kamado grill
    Sep 22, 2024
    Testing kamado grills is an intense experience for a griller. It requires playing with fire (literally) and high temperatures, though in a controlled, responsible way. The most critical element to kamado performance is heat, specifically temperature control and how well a grill holds to one temperature. To smoke meat low and slow, that magic number is 225 F. Good smokers, kamados or otherwise, will stick to this temp for as long as 12, 15 or 20 hours. This means the temperature gauge is key and so is the ability to control airflow via air vents or dampers. Firstly, to capture temperature data correctly, we put a thermocouple on each kamado grill. Essentially a sensitive temperature sensor made of a probe and a connected wire, the thermocouple hangs suspended just 1 inch above the grill grate. It's connected to a data logger and ultimately a computer that records changes in heat levels over time. And then, use the same weight and brand of lump charcoal (4.4 pounds or 2 kg), often from the same bag. That's true of fire starters too (one per grill) .After that, we light them up, as instructed by their manuals if available. Usually that means letting the coals catch for 15 minutes, with the lid open, then shutting the grill. At this point, vents remain wide open until the grill comes within 50 degrees of the target temp. We carefully fiddle with the vents to get there. Lastly, we let go of the controls and observe. Food grilling is always critical part in testing. Take this in mind, and try to do, like smoke a rack of baby back ribs (225 F) in each grill, or grill a set of four 8-ounce burger patties at high heat (600 F). Which smoker’s grilling flavor appeals you at the most?
    Read More
  • How does a kamado work?
    How does a kamado work?
    Sep 16, 2024
    How does a kamado work? The answer to this questions lies in both the big egg shape of the kamado and the ceramic material it’s made from. These two things are the keys to explaining how does a kamado work. WHAT MATERIAL ARE THEY MADE FROM AND WHY? Kamados are made of refractory ceramic. It’s an excellent insulator and reflects heat very well. So, heat released by the charcoal is absorbed into the ceramic and then reflected back to the grill. This results in excellent fuel efficiency. WHY ARE KAMADOS SHAPED LIKE A BIG EGG? The big egg or oval shape of the kamado creates a unique current for hot air to travel. Fresh air enters through the bottom vent. It’s then consumed by the burning charcoal and the hot gases rise. The shape of the kamado encourages the hot gases to circulate around the grill grates. This flow of the current of hot air cooks food evenly so that it stays juicy. KEEPING THE LID CLOSED It’s important to close the lid during cooking. As soon as the lid is closed, the shape of the kamado creates a unique current of hot air. So, by closing the lid, there will be little heat loss and that the ceramic barbecue maintains the desired temperature. This, along with controlling the heat in your kamado, gives you great control over the cooking process. HOW DO I CONTROL THE HEAT IN MY KAMADO? The temperature is controlled by throttling the air flow into and out of the kamado. Fresh air enters through the bottom vent. It’s then consumed by the burning charcoal and the hot gases rise by convection. So, if you let less fresh air in, the fire in the kamado will be less hot. So, by regulating the air flow, you control the temperature in the kamado. This delivers excellent control over the cooking process.
    Read More
  • Achieve smoky flavour in your Kamado grill without ever opening it!
    Achieve smoky flavour in your Kamado grill without ever opening it!
    Sep 16, 2024
    Achieving that smoky flavour in your Kamado grill without ever opening it can be accomplished through several effective methods. By following these strategies, you can achieve that smoky flavour in your Kamado grill without ever opening it, resulting in delicious and perfectly smoked dishes every time. Use a Smoking Chip Feeder: A smoking chip feeder is designed to slowly and evenly feed smoking chips or chunks into the heat source of your Kamado grill. This ensures a constant stream of smoke, allowing the food to absorb the rich smoky flavour without interruption. Preheat with Wood or Charcoal: Start by preheating your Kamado grill with a combination of wood and charcoal. The wood will ignite and produce smoke, which can be adjusted by controlling the airflow through the vents. Once the desired smoking temperature is reached, you can add your food without opening the grill too often. Control Airflow: The airflow through the vents on your Kamado grill is crucial for managing the intensity and duration of the smoke. Experiment with different vent settings to find the perfect balance that produces the desired amount of smoke while maintaining a stable cooking temperature. Use Quality Smoking Woods: Choose smoking woods that complement the food you're cooking. Different woods impart unique flavours. For example, hickory is known for its bold, hearty smoke, while applewood provides a sweeter, fruitier smoke. Wrap in Foil or Butcher Paper: Once the food has been smoking for a while and has absorbed a good amount of smoky flavour, you can wrap it in foil or butcher paper to help retain moisture and continue cooking without direct exposure to the heat and smoke. This method allows the food to rest and finish cooking while still retaining the smoky taste. Monitor Temperature and Smoke Level: Use a reliable thermometer to monitor the internal temperature of your Kamado grill. This will help you maintain a consistent cooking temperature, which is essential for even cooking and optimal smoke absorption. Additionally, keep an eye on the smoke level through the viewing window or by carefully lifting the lid a small amount if necessary. Plan Ahead: Plan your cooking session carefully, taking into account the time needed for the grill to preheat, the food to smoke, and any resting periods. This will help ensure that everything is ready at the right time, minimizing the need to open the grill door.
    Read More
  • Methods to reach different temperature in barbecue
    Methods to reach different temperature in barbecue
    Sep 10, 2024
    We all know that kamado smoker is made of ceramics that can be resistant greatly high temperature up to 1,000 ℃. Usually, grilling temperature is between 100℃ and 400 ℃. So how to reach temperature fitted for different grilling ways? Take it easy, it very easy to do by top vent and bottom vent. Both play a key role in controlling temperature. Now, let’s see how to reach different grilling temperature as we expected. To reach a low temperature of about 80℃ to 130 ℃ 1. Light the egg grill with a single fire starter and keep the lid open for 10-15 minutes with the bottom hatch fully open. The embers become red but there should be no flames. 2. Close the lid of the egg smoker and leave a small opening in the bottom hatch and open the chimney a little bit at the top. A stable temperature of around 100 °C is obtained. To reach a conventional temperature of about 150℃ to 250℃ 1.  Light the smoker with 2 fire starters and keep the lid open for about 15 to 20 minutes with the bottom flap fully open. The embers are red and small flames appear. 2.  Close the lid of the smoker and open the chimney at the top to reach 150°C. Once the desired temperature is reached, close 2/3 of the bottom flap and 2/3 of the top chimney to maintain a stable temperature. To reach a high temperature over 250℃ Light the smoker with 3 fire starters and keep the lid open for about 20 to 30 minutes with the bottom flap open to the maximum. The embers are glowing and large flames appear. Close the lid of the egg smoker and leave the bottom flap and the top chimney open to the maximum. Once the desired temperature has been reached, close the bottom flap and the top chimney halfway.
    Read More
1 2 3
A total of3pages

leave a message

leave a message
If you are interested in our products and want to know more details,please leave a message here,we will reply you as soon as we can.
submit

Home

Products

WhatsApp

contact